

How To Add Materials In Clip Studio Paint
How to Create & Install Custom Materials Packs
in Prune Studio Paint
INTRODUCTION
When you first installed Clip Studio Paint (CSP) – or Manga Studio – y'all probably also downloaded a large pack of boosted materials to install and it was really easy right? You ran the "Materials Installer" utility, it chugged away for a while, and when you re-opened CSP there were all sorts of new materials in the Materials palette, nicely tagged and organized for you.
If y'all're wondering where all the other cool materials are that yous can install, they're...in Japan. On the Celsys "Clip-Site" materials marketplace. Which is only bachelor to users in Nippon. Then, you may be wondering, where is the American materials marketplace? Well, there isn't one.
UPDATE Jan 2017
In mid-Dec 2016 Celsys pushed out update 1.6.two which now includes a Clip Studio Assets managing director, and the huge ZIP file of extra materials are no longer available or necessary. Updated versions of all of those materials, and other free materials released on the Celsys website, are now stored in what they're calling the "deject" and yous download them from in that location - either on-need or, if you lot don't mind an excruciatingly long download, everything in one run.
Though they are calling it a "cloud" information technology really isn't. It's simply a website from which y'all download the materials, none of YOUR materials or piece of work is uploaded to the site. It'southward non like Abode Creative Deject. The Clip Studio Assets manager, and the materials site it connects to, are like a seriously pared downward version of the Clip Studio Clip Site that has been available to users in Nihon for years. Those of u.s.a. outside of Japan, however, still practise not take official translations of the other programs in the Clip Studio Suite to produce, upload, share/sell our ain creations - merely hopefully this new Assets organization is the starting time stride in that direction.Until nosotros Practice get an official method for creating and sharing our own materials packs, however, the method outlined on this page however works!
While information technology is easy to import diverse things to CSP and create custom materials of your own, the plan has no office to easily export, redundancy, or share your custom materials with other users.
The majority of user-created materials are things like brushes, color swatches, patterns, or poses. For brushes and color swatches CSP actually has options to "consign" those sub-tools. Installation is relatively painless, equally y'all just drag and drop the downloaded brush or color prepare to the right palette.
For other materials users accept been dropping them into layers in a document so distributing the document. To install those you need to manually select each layer, annals information technology as a textile, and set its properties. That has pretty much been the only style to share any kind of material that appears in the Materials palette.
UNTIL NOW!
It took me virtually a calendar week of experimentation but I finally figured out HOW you lot collect your custom materials into packs that can be hands shared and installed past other users! You can't use the "Materials Installer" utility, but the procedure of installing a pack is really simple.
If you lot're only interested in installing packs created by other users, yous can skip the "Creating" department below and go to the "Installing" section.
DISCLAIMER
Installing user-created materials this way is an unofficial, unsupported hack. Considering this will make your CSP a "non-standard installation" do NOT expect either Celsys or Smith Micro client service to aid you if this messes up your organisation. You do this at your own risk. That said, the risk is pretty small and I'll fifty-fifty tell you lot how to prepare one of the problems you may run into.
Ok, if that didn't scare you lot off get yourself a fresh, favorite beverage, settle into a comfy position, and get set up to go to school - because nosotros've got a LOT of basis to cover...
CREATING CUSTOM MATERIALS
Under the "Edit" carte du jour there are two options to go your custom stuff into the Materials palette:
1. Register Image as Material – turns the selection - either marquee selection or layer(south) pick – into a fabric for the Materials palette. Nearly objects in CSP are considered "images.' The material'south native size volition merely be every bit big as the choice/object(s).
ii. Register Layer as Template Material – if the layer(south) consist of only comic frames it volition turn it into a "Framing Template," otherwise it will create a elementary "Layer Template" which volition take a native size as large every bit the entire sheet and the preview volition be shown with a white background (note, nonetheless the actual framing/layer template has a transparent background). A "Layer Template" is essentially the same as an Image Fabric and can be used in the same style Notwithstanding in that location is ane huge difference!

That difference is that anything that is prepare to exist a "template" will as well exist bachelor when yous initially create a document and check the "Template" box. Which would permit you to, for example, create a multi-folio certificate where every single page was created already including the elements of the selected template. And so, for example, if y'all wanted every page to be in a fancy frame, or every page to take a design around the page number, or every folio to accept a patterned background – you lot could create a custom template to exist applied when the document was created, thus saving yourself time and problem manually placing information technology on every page.
Pro-Tip: 99% of the time you're going to want to use "Register Image as Cloth" though.
Creating Custom Frame Templates
If you're working on a comic strip, as opposed to a comic book, y'all'll want to create a custom frame template. The frame templates that come with Prune Studio Pigment are geared more toward manga and may not exist the kind of layouts you desire. Here is a actually skillful tutorial on how to create your ain custom Frame templates: http://webcomics.com/annal-dive/manga-studio-how-to-build-a-template-2/
Call back to select either the individual layers that make upward the template or the layer folder that contains them and apply "Edit → Register Layer as Template Material."

Brand sure you select the "Manga Cloth → Framing Template" for the category in the Materials palette.

Creating Custom Patterns
If you have a seamless texture, or any other kind of image you want to tile, information technology's actually easy to add them. If the image is meant to be seamless make certain you edit it so the left side matches up to the right and the peak matches up to the bottom – and of course that the corners friction match to the reverse corner also. If y'all created or edited the image on the Canvass in CSP you tin go to "Edit → Register Prototype every bit Material" and in the Material Backdrop dialog cheque the "Scale Up/Downwardly," "Repeat," and "Specify Overlay" and motility the slider down to "Person/Item etc." - set it to one of the Pattern sub-categories, and put it in the Materials palette.
Note that there is also a way to convert multiple layers – including mixed raster and vector layers – into a pattern. Collect the layers into a layer folder and convert them to an "Image Material" (keep in mind whatsoever vector layers will be moved in a higher place raster layers, regardless of the layer lodge in the Layers palette). Then got to "Edit → Register Image every bit Textile" and set the properties.
Lastly, the easiest i, is to import an existing image every bit a pattern. Under "File → Import → Pattern from Prototype" it will bring it into the canvass already set as a repeating blueprint layer. Merely select the layer in the Layers palette and get to "Edit → Register Image as Cloth" and set the properties.
Custom Castor Tips
About whatsoever paradigm you create or import to CSP tin can be turned into a custom castor tip. When y'all select the layer(southward) go to "Edit → Register Image as Material" and make certain you check the "Use every bit Castor Tip" option under the preview image, and and then put information technology into the "Prototype Material → Brush" sub-category in the Materials palette. In one case information technology's at that place yous can duplicate whatever brush y'all desire in the Sub-Tool palette and change the brush tip of the duplicate pen/brush into your textile in the Tool Properties palette. Here are full instructions on how to exercise that: http://world wide web.clipstudio.internet/en/howto/kona_04
Exporting Custom Brushes
This is ane of two types of materials CSP volition really let you lot consign. Select the brush in the Sub-Tool Palette, right+click on it and select "Export sub-tool…" from the context menu. That will pop-up a dialog to say the ".sut" file.

This is the most common way people share their custom brushes with other users. They bundle upwards all their exported .sut files and other users but drag-and-drop them into their own Sub-Tool Palette.
Exporting Custom Color Sets
This is the other of the two types of materials CSP will actually permit yous export.
i. Select the color set in the driblet down of the Color Palette,
2. Then click the fly-out bill of fare at the acme of the palette, and select "Export Color Fix…"

Just as with brushes, it pops upwardly a dialog box request where to save the ".cls" file. I haven't actually seen a lot of custom colour sets floating around, but they too can be hands shared in this format assuasive other users to drag-and-driblet them to the Color Palette.
Creating Custom Castor Materials
Instead of keeping your custom brushes in the Sub-Tool Palette where yous might accidentally delete them y'all can store them equally re-usable, persistent materials in the Materials palette.

Select your custom brush in the Sub-Tool palette, right+click and select "Annals sub-tool as textile…" instead of the consign option. A Backdrop dialog box pops upward assuasive you to rename the brush, set a category in which to store information technology (Image Materials → Brush is a proficient place, or create your own custom sub-folder for them).

Now, y'all can delete the castor from the Sub-Tool Palette and restore it whenever you actually demand to use it by dragging-and-dropping it from the Materials palette to the Sub-Tool palette. Easy!

Improve yet, y'all can now categorize your brushes with tags to make the perfect brush fifty-fifty easier to find. It will automatically create the "Brush Tool" tag if it doesn't already exist, but you tin easily add your own tags by double-clicking on the brush in the Materials palette, which opens the Properties dialog where you tin can enter more tags.
You lot tin can, of course, get much more than detailed and organized beyond simply filtering brushes by tags. The experimental default brushes materials pack I made bachelor for download below uses the post-obit custom folders in the Materials Palette. Unfortunately the manual installation method has no manner to create these folders automatically, so anyone who downloads that pack volition have to manually create these folder (simply once they practise the brushes volition auto-sort themselves into them, and you can create the folders beforehand or after installing the pack, it doesn't affair).

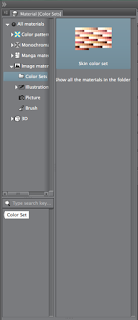
Creating Custom Color Set Materials
As with the custom brushes, you tin can besides keep your custom Color Sets in the Materials palette instead of the Color Palette. This allows yous to create a library of custom color sets with a squeamish little thumbnail preview of the color swatches.
1. Select the Color Set you want with the driblet-down menu in the Color Palette.
2. Hit the fly-out menu at the top of the palette and select "Register color set as material…" from the context menu.

The Material Properties dialog volition open up, requite your set a name, and hit "OK." It volition automatically create the "Color Fix" tag if it doesn't already exist.

Oh, simply where should you put colour sets in the Materials Palette? Well, y'all can put them anywhere you like, only it might exist easier to just create a new category named "Colour Sets" and put/movement them there.
This is a expert fashion to store color sets yous may non use very often. You can safely delete them from the drop-downwards listing in the Colour Palette and elevate them from the Materials Palette and drop them on the Color Palette whenever y'all need them.
Creating 2D Backgrounds, Illustrations, or Photos
These are really unproblematic. Import the images to the canvas, select the layer(due south) and "Edit → Register Images as Fabric" and set it into the correct sub-category of the Materials palette.
Creating 3D Objects, Backgrounds, or Characters
At that place is no mode to create 3D models inside Clip Studio Paint. You will need to create them in some modeling plan. Importing custom 3D models is equally uncomplicated as drag-and-drop them to the Sheet, with some limitations.
Supported file formats: c2fc, c2fr, fbx, lwo, obj, 6kt, 6kh
Both "c2fc" and "c2fr" are Clip Studio native formats, but are more than just models. They are collections of models, textures, poses, and camera affections information created with Clip Studio Coordinate. Which is a complimentary program, but is simply officially available in Japanese (however you can use a slightly older, unofficially translated English language linguistic communication version). These are the only file types you tin can safely drag and drop unzipped to the canvas and exist sure they'll import with the textures applied.
FBX is the recommended format, particularly for posable character models. Notation, however, that if the model's "basic" do not adjust to the "Celsys Standard Os" construction you will not be able to drag and drib poses onto the character, y'all volition take to manually pose it each fourth dimension yous use it. Zilch upward the folder containing the model and its textures and so elevate and drop information technology to the canvas.
Pro-Tip: If you are creating pose-able models read my other multi-part post on Making Models, download the sample models, and download the translated user manuals, which includes the Celsys Standard Bone spec.
OBJ files are best for static models, similar 3D Backgrounds (i.e., rooms, cars, etc.). In the model's folder (before you try to import information technology) you may need to move the object textures to the aforementioned level every bit the model itself and edit the "MTL" file to point to the new location, or after import the model will not have textures applied to it.
Those are the simply model formats with which I take worked in Clip Studio Paint. If a model won't import in Nada format, try unzipping information technology and elevate-and-drib the uncompressed binder and see if that works.
Once the model is on your sail y'all can select the 3D layer in the Layers palette and go to "Edit → Register Prototype as Cloth" (3D objects are considered "images").
Well, in one case you've registered them as Materials, though, you Will be able to create a custom Pack with 3D materials that will install (non import) directly to the Fabric palette.
CREATING CUSTOM MATERIALS PACKS
Once you've created your custom materials you lot may desire to collect them into a "pack" that can be backed-up or shared and installed by other Prune Studio Paint users. Here's how yous practice it!

1. The kickoff thing you'll demand to practise is Notice the registered materials in your local User Business relationship documents. On both Mac and Windows they'll be inside:
/Documents/CELSYS_EN/CLIPStudioCommon/Material
two. Within that "Material" folder you'll encounter a bunch of other folders with numbers for names. One or more than of those are what you're looking for. But which i(s)? To make it easier to narrow downwardly your search try sorting the contents by "Date Modified" which will raise the well-nigh contempo materials registered to the top of the list.

three. Open up each of the numbered folders in turn. They'll have one or more sub-folders, also with numbers for names. Inside those folders may exist more sub-folders with long, random (UUID) names. THESE are the ones we're looking for!
iv. When you detect a UUID folder, await inside of information technology for the "thumbnail" sub-binder. It volition take one or more paradigm files within of it. Ane of these volition be the same thumbnail representing that material in the Materials Palette in CSP.
v. When you've located the material(due south) you want, re-create the unabridged UUID folder for it to a new folder somewhere else, like on your desktop. This is where you'll be edifice your share-able materials pack.
6. One time you've institute all the folders for your materials and take copied them to your working pack binder you should probably put a README.TXT file in at that place also telling people what the pack is and how to install/uninstall information technology (you tin use the one I created as a template). You might likewise want to include a "contact sheet" image of what absurd stuff is in the pack and/or a web link to your website or whatsoever.

seven. Once all the contents of your Pack are prepare it'due south fourth dimension to compress it! Select all the individual UUID folders and the additional files you put at the root level of the folder and on Windows right+click and "Send to Archive" or on Mac correct+click and select "Compress to Annal."
Note: I recommend selecting the contents and compressing them, rather than the containing binder, because when decompressed on Windows it will ensure that the contents are but ane level deep in the unzipped folder. Otherwise they'd exist two levels deep and installation will neglect.
Annotation for Mac Users: Before y'all share your ZIP file make sure to make information technology cross-platform friendly past stripping out the Mac-only files. I recommend using ZipCleaner to do that, you just drag and driblet the Zero file onto the ZipCleaner icon and confirm the removal of the platform-specific files.
8. Rename the resulting ZIP annal to something descriptive.
9. Share the Pack online with other CSP users.
That's it! You're now in the Prune Studio Paint custom materials biz!
INSTALLING CUSTOM MATERIALS PACKS

i. Download the Pack annal, which is probably a Aught file.
2. Decompress/United nations-Zero the Pack
3. Re-create/Motion/Excerpt the Pack Folder (not merely the contents) to the GLOBAL FOLDER Install Location:
GLOBAL Folder Install Location
On Mac:
Volumes/[Mac Drive]/Library/Awarding Support/CELSYS_EN/CLIPStudio/Common/Textile/Install/
On Windows:
C:\ProgramData\CELSYS_EN\CLIPStudio\Mutual\Material\Install
Note: "ProgramData" is a hidden folder

four. Open up CSP and run "Reset Installed Materials" functioning (under the "Clip Studio Pigment" card on Mac, or under "File" on Windows).

UPDATE JANUARY 2017: Beginning in version 1.half dozen.2 the Install/Organize/Reset operations accept been moved to the separate Clip Studio Avails Manager app under the "Gear" icon → Maintenance Menu → Reset Installed Materials.

5. Information technology will ask you lot to confirm the materials reset, click OK:

6. Wait for the progress bar to finish:

Done! The new Materials should now be in your Materials palette.
Pro-Tip: You tin can drag multiple Custom Materials Packs into the Global Install Location and install them all in i Reset. You do not take to do them one at a fourth dimension and keep re-running the Reset operation!
UNINSTALLING CUSTOM MATERIALS PACKS
There are two locations where installed materials exist. The aforementioned "Global" location, which applies to ALL USERS of the computer and the "Local" location which is within a specific User Account on the computer.
Typically just someone with "Ambassador" privileges would exist able to alter the contents of the Global Folder, simply regular User Accounts could not. A regular User Account would just be able to alter the contents of the Local Folder. An Administrator could, of class, modify the contents of both locations.
It is very purposely set up this way! The system'south Administrator gets to decide what Materials are in the Global Folder, which acts every bit sort of a "Master Library" of materials fabricated bachelor to all users on the organisation. Information technology may seem heavy-handed or like overkill if you're the only person who uses your computer or information technology is a habitation computer. However, if you think about information technology this makes total sense if yous were in a production environment and were using licensed materials or materials that required some kind of sign-off before they could be used. An Administrator would have to make sure no materials were bachelor in that "Chief Library" that hadn't been licensed or otherwise approved.
Individual users, though, may not take any utilize for some of those materials and therefore can customize their working listing by deleting materials they don't use from the Materials Palette without affecting their availability to other users. In fact, if the User deleted the material accidentally a simple "reset" performance will restore it from the Global Binder.
Nonetheless, if an Administrator deletes a cloth from the Global Binder it will no longer be available in that "Main Library" or to Any users on the organisation. The next time any user opens Clip Studio Paint it would go through the "first run" initialization procedure once again - during which information technology rectifies differences between the contents of the two locations and automatically removes materials from the User's "Local Binder" if they are no longer available in the "Global Binder." This allows an Administrator to authorize and revoke materials and enforces those decisions on all User Accounts.
Still, when you create custom materials they only exist within your User Business relationship local Documents folder - they aren't fifty-fifty bachelor to other users on the same computer. If you followed my instructions above on how to collect materials into packs you lot may accept noticed that the randomly numbered folders but within your Documents/.../Materials/ sub-folder are at the same level as the "Install" folder. When you alter the contents of the Global Install Location it only affects the contents of users' Local Install Location - meaning only things inside the "Install" folder, not any custom materials that exist outside of it.
UNINSTALL Individual PACK MATERIALS (LOCAL)
1. Open up Clip Studio Paint
2. Navigate to the Textile(south) you wish to remove in the Materials palette.
iii. Select the Textile(s) to exist removed
four. Click the Trash icon at the bottom of the Materials palette.
5. Confirm the deletion.
Note: To restore previously removed materials run "Reset Installed Materials" over again, information technology will copy them from the GLOBAL FOLDER into the Local Folder again.
UNINSTALL Full PACK (LOCAL Binder)
1. Delete Pack binder from LOCAL Folder Install location:
On Mac:
Volumes/[Mac Drive]/Users/[YourUserName]/Documents/CELSYS_EN/CLIPStudioCommon/Material/Install/
On Windows:
C:\Users\[YourUserName]\Documents\CELSYS_EN\CLIPStudioCommon\Material\Install\
ii. Open Prune Studio Pigment
iii. Update the local database by running " Organize Materials" (under the "Clip Studio Paint" menu on Mac, or under "File" on Windows).
UPDATE JANUARY 2017: First in version 1.6.ii the Install/Organize/Reset operations have been moved to the separate Clip Studio Assets Director app under the"Gear" icon → Maintenance Menu → Organize Materials.

4. Confirm the functioning, a progress bar appears, wait for information technology to complete.

Note: To get them dorsum only re-run "Reset Installed Materials" and information technology will pull it dorsum from the ALL USERS global installation.
UNINSTALLING INDIVIDUAL PACK MATERIALS (GLOBAL FOLDER)
1. Go to the GLOBAL FOLDER Install location
ii. Detect the Pack folder inside information technology
three. Look in each private pack material sub-folder (the ones with the long, random file names)
4. Look at the image file in the "thumbnail" sub-folder.
5. If it is a fabric yous desire to remove, delete the parent folder with the long, random UUID file name).
When users on the same computer open Clip Studio Pigment it should pop up a dialog box that says:
"Preparing to apply. Practice non kickoff other Prune STUDIO series until this process is completed."
You have no other option only to printing "OK" which volition and so automatically remove the materials from that User's LOCAL Binder as well.
UNINSTALLING FULL PACK (GLOBAL FOLDER)
1. Go to the GLOBAL Binder Install location
ii. Delete the unabridged Pack folder from GLOBAL FOLDER Install location
When users on the same estimator open Clip Studio Paint it should pop up a dialog box that says:
"Preparing to employ. Do not outset other Clip STUDIO series until this process is completed."
You have no other selection but to press "OK" which will and so automatically remove the materials from that User's LOCAL FOLDER also.
KNOWN Problems
Set Error: "Initialization of install materials failed"
This fault is more common on Windows machines. 1 known crusade is to have a computer user account proper name containing certain characters, for case, a High german name with an umlaut. The only fix for that trouble is to create a new user account on the estimator with a simple proper noun containing no not-English characters and run across if that fixes it.
Ah, but what do you do if you're seeing this and you lot accept a unproblematic user name like "Joe" or "Beth" and you want to install custom materials?
You NUKE your local materials catalog file (in other words y'all delete it).
On both Mac and Windows it is located in your user account Documents folder:
Documents/CELSYS_EN/CLIPStudioCommon/MaterialDB/CatalogMaterial.cmdb
The adjacent fourth dimension you open Clip Studio Pigment it will automatically create a fresh, merely empty, CatalogMaterial.cmdb file. Now run the "Reset Installed Materials" performance (under File on Windows, nether Prune Studio Paint menu on Mac).
That should set up it, though it may happen again the next fourth dimension yous install a custom material pack.
Oftentimes ASKED QUESTIONS (FAQ)
Q. Why can't you apply the Materials Installer utility to install these materials?
A. The only installable pack I had available for testing was the 1 provided by Celsys for people to install right after installing CSP. It has a file in it called "material.inf" that is plain what allows the Materials Installer Utility to recognize it as an installable materials pack.
I tried changing the name to something else, but it appears this file MUST be named "material.inf" or it fails. Unfortunately it is not a text file like many INF files are and it cannot exist edited. It really appears to be a binary file, merely I couldn't make sense of any of it in a Hex Editor either. Perhaps it'south encrypted. I don't know. Merely unless and until someone figures out what format this file is in and/or how to edit/create them, there is no way to go the Materials Installer utility to recognize the pack as an installable.
Thankfully you don't actually need information technology. The transmission installation method is really easy – the only downside is you need Admin access to the computer (but I'm guessing that isn't a big problem for virtually people).
Q. Can you create custom folders for your materials in the Materials palette?
A. Ideally you should figure out which of the existing folders should incorporate your textile(s), merely information technology is possible to for y'all to create your own custom folders and binder bureaucracy. However, afterward installation on another user's system your materials will "call up" a folder structure that doesn't exist on the other user'south system. If the same folder structure (with the same names) are created on that user's system the materials in your pack will automatically sort themselves into them. Otherwise they'll but exist bachelor at the lowest level binder that does be.
Practice not assume other users will have or create non-standard folders on their system.
For example, the "Default Brushes" pack available beneath was created with a "Tools" folder directly under the "All Materials" level of the Materials palette. Without the "Tools" folder, and it's sub-folders, the brushes in the pack will ONLY appear if you select "All Materials" because information technology is the lowest-level binder that does exist.
Equally another example, let's say you created a large sub-set of monochrome patterns and y'all put them in a sub-folder chosen "Ancient_Egypt" under " All materials → Monochrome Patterns → Patterns" and and so distribute them in a pack. When other users install them on their system they'll appear in that final binder named "Patterns" because it is the lowest-level binder that does be. If that user then creates a folder inside "Patterns" and names information technology "Ancient_Egypt" suddenly all the materials from your custom pack volition automatically sort themselves into it.
Pro-Tip: when creating custom folder names merely the first word can exist capitalized. If yous intend for boosted words to be capitalized do not use a space in between, use a dash or an underscore.
Q. Why do the custom packs demand to exist installed to the "Global Folder?"
A. In my testing I found out that you Can install a pack direct into the LOCAL folder, and run the "Organize Materials" operation to get the materials to show up in the Materials Palette. Just they won't survive a restart of CSP. On restart CSP apparently scans for differences betwixt the LOCAL and GLOBAL folders and automatically rectifies the local one to incorporate but the same materials every bit the global one. You tin can manually remove materials you don't use that are part of that primary set without affecting other users, but yous can't have materials that aren't role of the master set.
This may seem annoying, simply it sort of makes sense. The system Administrator should have final say in what is installed on the system, non User level accounts. If you were using this in a commercial setting you'd certainly want an authoritative person deciding which materials are available to employees using that calculator, to make sure nobody is using anything unlicensed or from an unknown source.
Q. Why does it sometimes popular up a dialog box that says it's running for the first time?
A. Because the custom packs are not existence installed by the Materials Installer utility there is evidently some piffling thing that isn't getting updated in the materials database, so on start-up it detects materials folders information technology doesn't immediately recognize and does a quick bank check to meet if they're likewise in the Global install location. Which they should be, at which point it proceeds normally. In my experience it just tended to do this right after installing the materials and perchance the start fourth dimension you open CSP on subsequent days.
Incidentally, if you have materials in the Local folder that aren't in the Global binder, while this "kickoff run" dialog is being displayed is when it automatically deletes the contents of the "unauthorized" binder.
Q. If the database is screwed up can you gear up it manually?
A. Technically, yep. Y'all can. All of the user's CSP settings and resources are either stored in plain text files or SQL Lite database files. For the database files if they get decadent yous tin unremarkably simply remove them from their respective folders and the next time you open up CSP it will recreate them. If it'due south seriously screwed reinstalling Prune Studio Pigment is probably the all-time plan.
Q. What happens if the UUID of my custom cloth is the aforementioned as someone else's?
A. The UUID is practically unique and the odds of another material being assigned the exact same code is very slim. Furthermore, Prune Studio Paint doesn't really use the UUID on the folder in your custom pack. When the cloth is installed information technology will be assigned a "Itemize ID" (stored in the CatalogMaterial.cmdb database file) with a reference to the original UUID and the path to the original file in the pack. Therefore, even if the same material is in two packs the materials itemize will care for them as different because they originate from different paths and are assigned unique UUIDs on installation. In other words, don't worry almost information technology.
EXPERIMENTAL Exam PACKS
In the process of figuring all this out I created some experimental "test packs" to see if I could successfully build them, install them, uninstall them, reinstall them...all in all I did that a good dozen times with the Clip Studio Paint 1.5.x English version on both Mac and Windows.
In real-life I merely know one other person who has Clip Studio Paint installed on their system (Windows) and I repeatedly asked him to please try to install and uninstall these experimental packs I created. Merely he's not very tech-savvy and I guess, despite my reassurances, I was asking him to do something outside his comfort zone.
Then understand that YOU are now the guinea pigs in my experiment! How'southward that for a disclaimer?
Trust me, though, if you follow my instructions to the letter of the alphabet you won't screw up your installation. I never actually had to reinstall the Prune Studio Paint app, and if I didn't completely hose my install you aren't going to either. Ok, here they are – the links to the experimental packs, download one or all of them:
Kirby Layouts Version 1 (DOWNLOAD)
A rough endeavor to create a gear up of comic page layouts inspired past the panel arrangements preferred by Jack Kirby. These need to be tightened up a bit, but they testify how to create a layout template pack.
Adds all the default brushes from the Brushes palette to your Materials Palette. Make certain you follow the README file! It explains how to create the custom folders that organize the brushes into sets.
A fix of 9 new seamless argyle clothing patterns. These will be automatically added to your existing patterns.
A set of 9 new seamless plaid clothing patterns. These will be automatically added to your existing patterns.
A set of seven new seamless tartan patterns. These will exist added to your existing patterns.
A set that includes my Caveman Grunk 3D character model, a rock-age firm for him equally a 3D Background model, his Caveman Club every bit a 3D Object, and a 2D Illustrated background image. If y'all desire to know how all of it was put together please read my multi-function Making Models article, which also includes a link to ZIP with all the source materials used to create these materials.

"Grunk is habitation owner at present!"
Later installation if you make up one's mind you don't like or want a pack simply follow the uninstallation instructions above.
I actually promise this will encourage people to create custom materials packs and share them, since those of the states outside of Japan do not have a user-created content market this is really our just option. Please postal service your questions, comments, or links to your own packs in the comments below.

How To Add Materials In Clip Studio Paint,
Source: http://offworldgirl.blogspot.com/p/custom-clip-studio-paint-materials-packs.html
Posted by: kellylithen.blogspot.com
0 Response to "How To Add Materials In Clip Studio Paint"
Post a Comment